
- Fountain Pens
Full Size - Fountain Pens
Midi Size - Fountain Pens
Mini / Pocket - Fountain Pens
w-Metal Bands - Fountain Pens
w-Acrylic Bands - Other
Pens/Pcls - Desk
Pens - Other
Items - Contact
& Info
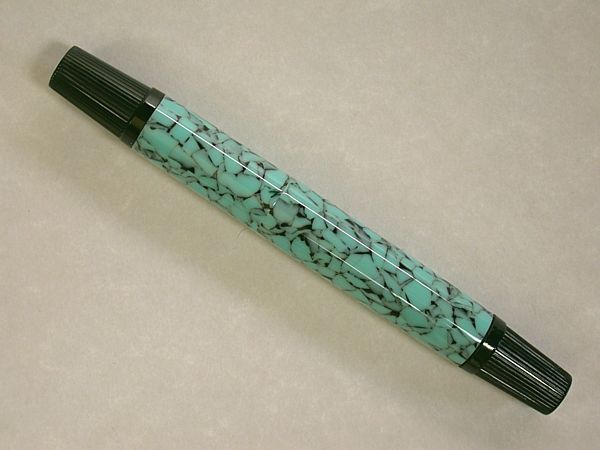
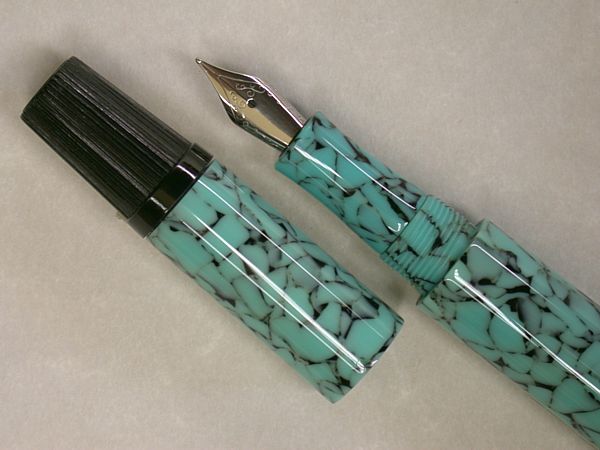
Custom 'Wire-Cap' Fountain Pen
in Crushed Turquoise Acrylic.
(Click each photo to view larger views)
 |
 |
 |
 |
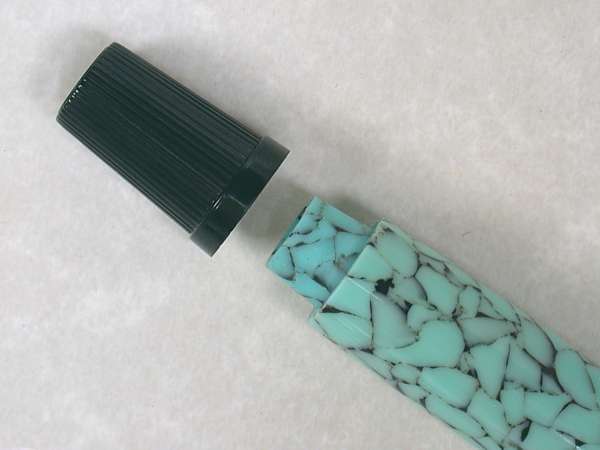 |
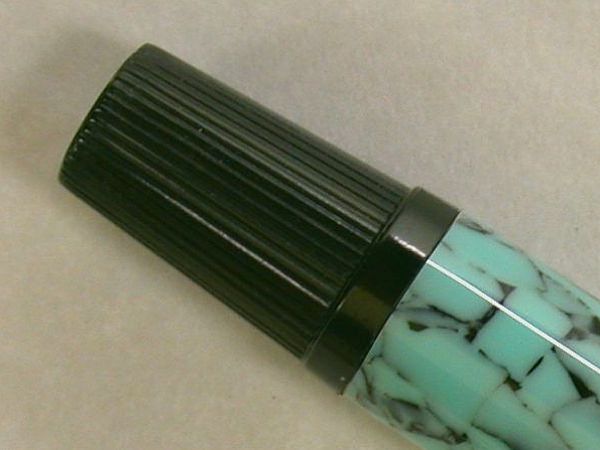
The photo at the LEFT shows how the cap |
 |
About this Pen:
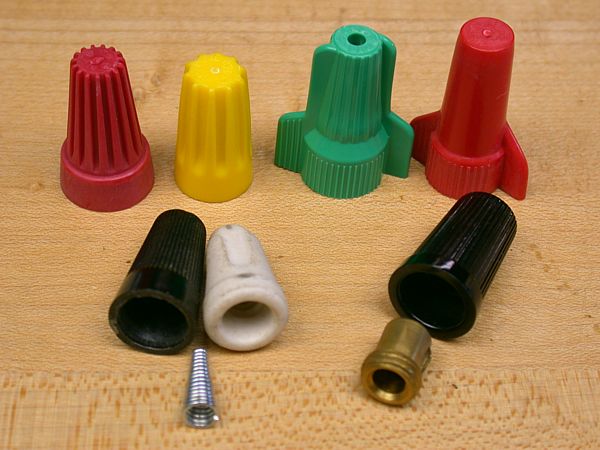
This pen was one of those 'I wonder if...' idea projects I had been thinking about. I was thinking about how I might be able to make a 2-tone Lhotse, which is my version of the traditional 'cigar' pen. At the same time, I was also thinking about how to incorporate unusual items into some pens, and some vintage wire connectors (also referred to as wire 'caps'--which is what I call them) came to mind. If you're not an electrician, or have done any type of electrical work, you're probably not familar with a what a wire cap is, or what it's used for. It's one of those items that is used for exactly what it's name implies-- it 'caps' or covers the end of bare wires.
Wire caps have evolved over the years. The photo bottom-right above shows examples of some of the various styles used over the years. The colored caps along the top are the current styles being used. In the early 1900's, the caps at the bottom were used. The white cap is porcelein, while the back caps are Bakelite ( the first plastic made from synthetic components). Modern caps are held onto the end of the wires via some type of internal holding system to grab the wire or wires as the cap is being twisted onto the wires (usually some type of threading system similar to the threads inside a bolt nut). The Backelite cap on the left used a similar threaded insert. However the Bakelite cap on the RIGHT used an brass insert that was first placed over the wires and secured with a small bolt through the side. Then the Bakelite cap was theaded onto the brass insert.
I'm explaining all this in order to lead into which cap I used and why I used it. I ultimately used the Backalite caps with the brass insert because it had the best shape and size. But also because I thought the black caps would look more traditional and harder for someone to recognize what they actually were.
Installing the wire caps... To install the wire caps, I simply turned tapered tenons on the ends of the cap and barrel making sure the diameter of the tenon matched the inside diameter of the wire caps, and the diameter at the end of the pen parts matched the outside diameter at the base of the caps.
Using other wire caps... You could use some of the modern style wire caps. However unfortunately modern caps are made in bright colors: yellow, red, green, and orange that color coded for the wire size they are to be used with. So if you like the idea, and would like such a one of a kind pen, it will have to be made with bright colors. For obvious reasons though, you want to stay away from the cap styles with the 'wings' or tightening tabs. Wire caps are sold based on the wires GAUGE size, and the smaller the gauge, the larger the cap. For example a 6 gauge wire is much larger than a 12 gauge wire. A wire cap for wire gauges 8 to 14 would work best.
About this Material:
This
material is an Acrylic Acetate called 'Crushed Turquoise'. It's also sold under other names depending on the supplier. The pattern is different from most other CRUSHED acrylics. Typically a crushed pattern gives the mateial depth. But that is when transparent colors are used. Here OPAQUE colors were used--opaque chips mixed into an opaque base. The chips are are the turquoise, the base color is black). The result creates the 'web' pattern you see.
This Pen's Specifications:
Color / Material: Crushed Turquoise Acrylic Acetate.
Wire Cap material: Bakelite.
Length: Capped 5.36" / Uncapped 4.95".
Diameter: Max .60" / Min .45" (wire cap top).
Nib - #5 Polished Steel Meister.
Filling System: C/C.

