Pnut Custom POCKET Fountain Pen
(Click the photo's above to see larger views)
Drop down to the bottom of the page to see other colors and patterns.
About the Name:
If it's not immediately obvious, the name for the Pnut (short for "PEANUT") came first from the shape, second from the size. I usually use a name from one of the worlds tallest mountains for pen names, but as I looked through the list, I couldn't find one that fit well. But when I came up with this shape while I was working on the style, I knew that I had to use the name "peanut" because it represented both the size and the shape of the pen. But then to keep with the acronym theme I used for the PFP (PFP stands for "Pocket Fountain Pen"), I decided to shorten the name to just "Pnut".
About the Pnut:
The Pnut is my latest custom pocket size fountain pen! As I've done with some of my other pens, I wanted to share a little background about the pen, how it works, and some ordering information. So I hope you won't let this full page of text scare you away. I'm hopeful you'll find the information useful, but not too boring. If you have any additional questions about the pen, or need clarification of any of the information, please don't hesitate to send me an email.
Background... The PFP was my first "Pocket" Pen, and I originally made it just to see if I could make a miniature pen. But after I posted some photo's on one of the pen forums, it created quite an interest and I started getting inquires for them. Eventually I decided to add them as a standard model to my line up, and now it's one of my most popular pens. So with the success of the PFP, I decided to explorer the possibilities of offering another portable pen.
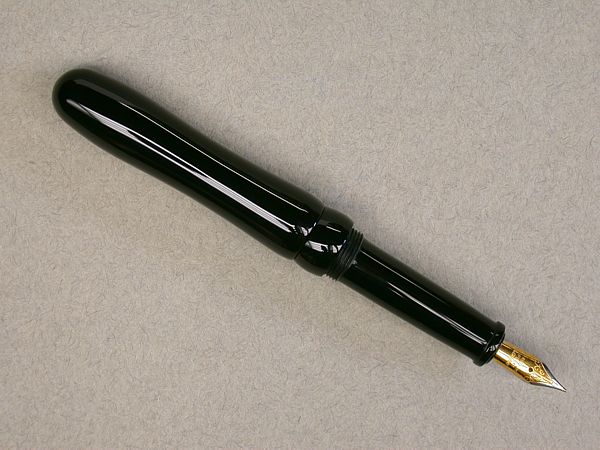
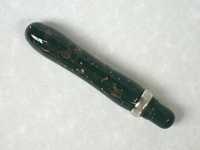
Styling... As with the style of the PFP, I like the idea of a pen that has a very small initial footprint, but when needed, it can be quickly transformed into a longer pen you can easily write with, so I wanted to have a similar style with this pen. I also wanted the pen to have an organic feel so it would be comfortable to carry in a pant pocket or purse, but I didn't want the style to look too similar to the PFP. So after a few mock ups, I decided on this "peanut" shape.
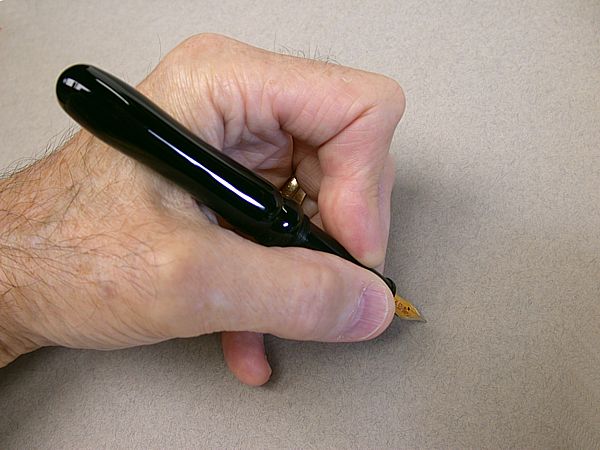
But there's more to the pens shape than just looking like a peanut. Not only does the shape give the pen that organic look I was after, it also helps to makes the pen more ergonomic, so it's very comfortable to use. The 'pinch' in the center of the outer shell (get it-- peanut-- outer shell) falls right into the web between your thumb and forefinger when you grip it to write.
Size... The Pnut is sized similar to the PFP, and like the PFP, because they are hand-made, the size can vary slightly with each one. The closed length is about 3 1/2", and when posted, grows to about 5 1/4". The maximum diameter of the other shell is 5/8", and the weight (without ink) is only about 12 gms (for the all acrylic model).
Filling the Pnut-- a tale of two options...
When I initially worked up the pen, it was only setup to be used as an eyedropper, having a small access cap at the back end of the one-piece barrel that gave access for filling it with ink. But when I inked it up, I found I had a little problem. Because I was putting the ink into the back end of the barrel--opposite the nib--initially, I had a little bit of a problem with ink draining through the nib before I could get the cap screwed back on. That made filling the pen quite tricky (as well as a little messy), so I felt I needed to come up with a better filling option. But as sometimes happens, that initial problem turned out to be a blessing in disguise, because as a result, I not only solved the ink draining problem, but it also allow the use of a disposable cartridge as well. So that gave the pen two filling options:
a) Using a disposable cartridge...
If you elect to use a disposable cartridge, you simply remove the filler cap and insert the cartridge into the back end of the barrel, then push it in firmly to break the seal and seat it down onto the nipple on the back of the nib housing. Then slide the open end of the filler-cap down over the cartridge, and screw it tight.
b) Filling the pen Eyedropper style...
(note: if you're not familiar with the term, "Eyedropper" is the named used for a pen that is filled "directly" with ink. And "directly" means putting the ink directly into the barrel instead of using any kind of a reservoir to hold the ink). With the Pnut, the ink will go into the filler-cap instead of directly into the barrel. After the filler cap is removed, you hold it upright (open end up), then fill it with ink. Afterwards slide the barrel down over the cap and screw it securely. Just like the PFP, this pen incorporates a rubber o-ring above the filler cap threads to ensure a tight seal against the barrel without the need to use silicone grease on the threads.
A little helper included... I've made mention both on my website and in e-mails to clients that a long needle syringe can be a very helpful tool to have when filling a fountain pen. I use to use them many year ago to fill the ink cartridges for my computer printer. I eventually gave that up, but I kept the syringes (they work great for small gluing applications in the workshop). Then when I got into pen making, I found them useful for filling fountain pens and would always recommended them. But now instead of just recommending them, I decided to stock some and include one with the mini pens. So if you order a Pnut, it will include a 5ml volume syringe with a long (blunt-nose) needle.
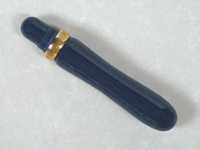
How to use... To use the pen once it's filled with ink, you simply grab the posting ring (the band that sits in the middle of the threads) and unscrew the inner barrel from the outer shell, flip it around and screw it back in. Once reconnected, you have a pen that's over 5 1/4" long. And if you're in a hurry or need to give a quick signature, the barrel/section alone is just long enough that it can be used independently without posting.
Ordering information... As with all of my other pens, you can custom order a pen in a variety of acrylics. If you would like help picking out something, I'd be glad to send you some links. The Pnut includes a #5 Meister nib in either a fine or medium tip and in either a 2-tone or polished steel finish, a long needle 5ml syringe as mentioned earlier, and two disposable ink cartridges so if you don't have bottle ink, you can get started using the pen right out of the box.
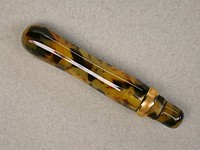
Upgrade option... The original Pnut is made in all acrylic, but if you'd like to add a little bling to your pen, you can upgraded the acrylic posting band with a metal one. The tortoise acrylic pen below show a pen with that upgrade. You can choose either solid brass, chrome or 24k gold finish for the band, so you can color coordinate it with your nib.
THANKS! If you've persevered and read all the way through, I thank you for your patience, and hope you've found the information helpful. If you're excited about the pen and would like to order one or you have some additional questions, please don't hesitate to contact me. I look forward to hearing from you!
Other JEB's PENs Offerings...
I also offer a variety of hand-made Pen Props and Pen Buttons. You can order a Pen Prop in a material to match your pen, or any one of the wooden styles made in a variety of stained or dyed colors. The Pen Buttons are available for any of the clipless pens. Other new items available are cuff-links and button covers. Both can be ordered with acrylic centers that match your custom pen.
(Click the pens below to see additional photo's and specifications of each one)
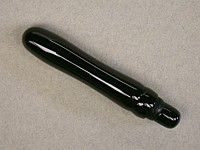
| Solid Black |
 |
|
|
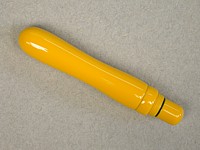
| Mandarin Yellow |
 |
|
|
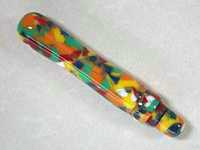
| Confetti |
 |
|
|
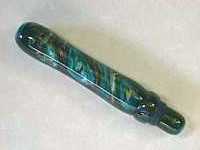
| Stormy Nights |
 |
|
|
| Tortoise w/Band |
 |
|
|
| CS Dartmoor w/Band |
 |
|
|
| CS Lapis Blue w/Band |
 |
|
|