- Fountain Pens
Full Size - Fountain Pens
Midi Size - Fountain Pens
Mini / Pocket - Fountain Pens
w-Metal Bands - Fountain Pens
w-Acrylic Bands - Other
Pens/Pcls - Desk
Pens - Other
Items - Contact
& Info
Fountain Pen Inking Systems available at JEB's PENs
I'm pleased to be able to offer a variety of inking systems in my fountain pens. While the vast majority of pens are ordered with a standard C/C (cartridge/converter) inking system, there are several other systems currently available. And I'm always looking into new systems I can offer (see below), so if you don't see your favorite here right now, I may have it in the future. Currently, I am able to offer the following alternative inking systems in my fountain pens: EYEDROPPERS, BUTTON-fillers, LEVER-fillers, BULB-fillers, and PISTON-fillers. I should also mention here that most of my fountain pen styles can also be ordered as Rollerball or ballpoint pens as well. If you are not familiar with any of these alternative inking systems, I listed a little information on how each of the systems work. Click the titles above the photo's to drop down the page to that information. Clicking the photo will bring up a larger view. If you have any additional questions about any of the system, please don't hesitate to contact me.
| Eyedropper | Button-filler | Lever-filler |
 |
 |
 |
| Piston-filler | Bulb-filler | |
 |
 |
 |
Rollerball / Ballpoint Pens
 |
 |
 |
 |
Of all the various filling systems, the EYEDROPPER is the most basic. And of all the various systems, it may be the only one to have you scratching your head at first wondering how it might work. But the name actually hints to its method. So once you understand how the term is 'used' (hint) in the application, the naming becomes clear. Give up? OK. Its called an EYEDROPPER, because you use an 'eyedropper' to fill it. You see, the Eyedropper doesn't have ANY internal parts. You simply use an eyedropper to fill the cavity in the barrel (where a refill or converter would normally slide into) directly with ink. But the key to the system working, is to ensure you have an air-tight seal. If you don't, the ink will just bleed out. So the Section must have a tight seal against the Barrel to avoid leaks. Since there aren't any special parts used, theoretically, ANY C/C pen could be converted into an Eyedropper simply by creating that seal. So typically the seal is create by simply applying a liberal amount of silicone grease to the Section threads. The grease closes up any gaps in the threads and will (usually) create a seal. But if you order your pen as an Eyedropper, it will come with a special o-ring fitted on the Section that will create that seal. So all you have to do is fill the barrel with either an eyedropper or small syringe, and screw on the Section. Although there are a few exceptions, most of my pens can be ordered as Eyedroppers.
One advantage of using the barrel itself as the ink storage in the eyedropper is that it holds a larger volume of ink. You can also order the pen with what is referred to as an INK-VIEW (a see-thru piece of acrylic) so you can monitor how much ink you have. An Ink-view can be made with clear or colored transparent acrylic. I offer several different styles of Ink-view barrels: a) as a small clear section in the barrel; b) as just a small clear DOT; or c) as a completely clear barrel.
(click here to go back to the top of the page)
The name suggests a hint of how a Button-filler works-- to put it in the simplest terms, a BUTTON is pushed to fill the pen. While that sounds simple, there is a fairly complex system inside the barrel that allows the system to work. The system consists of three main parts: the Button, a Pressure-bar, and a Sac.
The BUTTON is hidden under a small cap at the end of the barrel that is called a Blind-cap. The SAC is s a flexible tube that stores the ink with the open end attached to the Section. In between the Button and Sac is the PRESSURE-BAR. When you press the Button, it pushes the Pressure-bar against the Sac, causing it to compress. The compression creates a circular movement forcing air out, and allowing ink in. So when you press the Button, air is forced out (seen as bubbles in the ink bottle). Then when you release the Button, the vacuum created once the air is expelled slowly pulls ink up into the Sac.
To fill a Button-filler, you first must have a JAR of ink. It must be deep enough and have enough ink to cover the nib and part of the Section. Remove the lid, then submerge the NIB and the front of the SECTION into the ink. Then while keeping them submerged, press the Button fully. When you do, air is expelled and seen as bubbles in the ink. Then quickly release the Button while continuing to keep the parts submerged. Then wait several seconds (at least 10-to-15--as it takes a little while for the ink to bleed up into the Sac). Then REPEAT the process until you can no longer see any bubbles when you press the Button. Once you no longer see air bubble, the pen is full. Remove the pen from the jar and wipe it clean. That's all there is to it! If you want to change inks, then preform the same action, but with water first to thoroughly flush out the system until you can flush clear water.
(click here to go back to the top of the page)
While a Button-filler uses a button, just as the name suggests, a Lever-filler uses a LEVER instead. The Lever is mounted along the side of the Barrel, and uses a similar Pressure-bar. The filling process is also the same. But here, instead of compressing a Button, you are lifting a LEVER. The Lever is hinged, so as you raise one end of the Lever, the other end presses against the Pressure-bar, forcing it to compress the Sac and push out the air. Then you simply flip the Lever back down to bring in ink. And just like the Button-filler, you repeat the process until you no longer see any air bubbles.
(click here to go back to the top of the page)
Unfortunately, this system is no longer available.
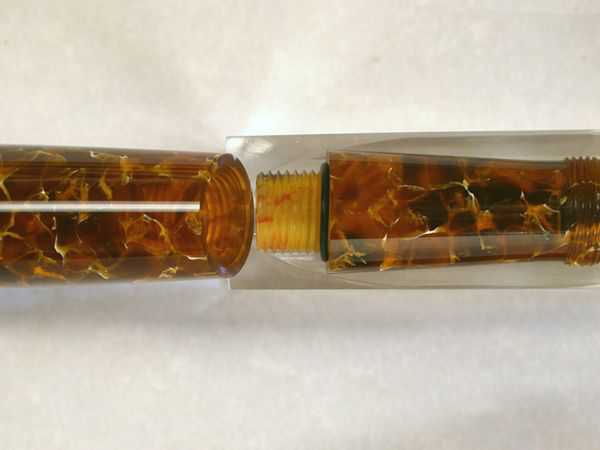
PISTON-filler systems work by the same push-air-out and draw-ink-in principal as the other mechanical filler systems. However there have been multiple methods created for doing it. Some can be quite simple, while others can be quite complex. The system works by using a Piston or plunger mechanism to force out the air. A standard Converter actually utilizes one type of Piston system. The system I currently offer (shown above) is quite simple and is made using a 1-piece mechanism insert operated with a rotating Blind-cap. Turing the Blind-cap moves the piston up and down. It works much the same way as a Converter does, but the advantage is that it stores a larger volume of ink.
Version #2... I have another PISTON system that I've been working on, but it's not available yet. It's one of the more traditional Piston systems found in older pens, but it's a little more challenging to create. I'm hoping I can offer one sometime in the future.
(click here to go back to the top of the page)
Again, just as with the other systems, the name hints at how it might work. This time, a part referred to as a BULB is what you interact with to fill the pen. The Bulb is similar to an ink SAC, but in this case it is only used to create the air/ink exchange, rather than storage. With the exception of the Eyedropper, this system uses the least amount of parts, but is typically the trickiest system to get setup. To cause the movement of the air/ink exchange, a Bulb-filler requires a BREATHER-TUBE. The Breather-tube forces the air out through one area of the nib feed, allowing the ink to come in through another area of the nib feed. To fill, you press the Bulb QUICKLY, wait for the air bubbles. Then as with the other systems, release the bulb and wait a few seconds for the ink works its way up into the reservoir inside the barrel. It doesn't take as long here, but less ink is brought in. So you have to repeat the procedure several more times. Just like the Eyedropper, you can order your Bulb-filler with an INK-VIEW as described in the Eyedropper section.
(click here to go back to the top of the page)
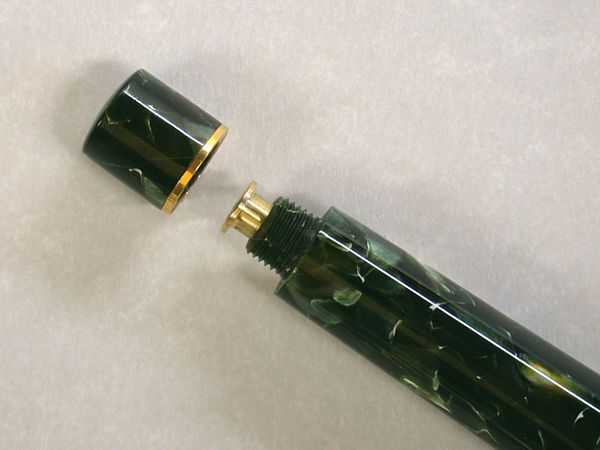
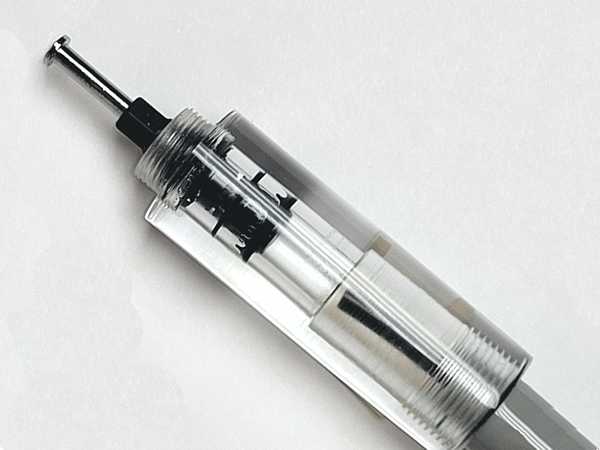
This system is very similar to that used in very famous Parker Vacumatic pens. It consists of a one piece mechanism that screws into the top of the barrel (once the correct size holes are drilled and tapped). It self-seals when screwed into place, so it can be easily removed for cleaning. The rubber seal and inside of the barrel is coated with silicone grease to aid sealing as well as avoid excessive wear on the rubber seal. So if remove for cleaning, just be sure to apply a liberal amount of grease around the rubber seal, as well as a thin layer inside the upper end of the barrel.
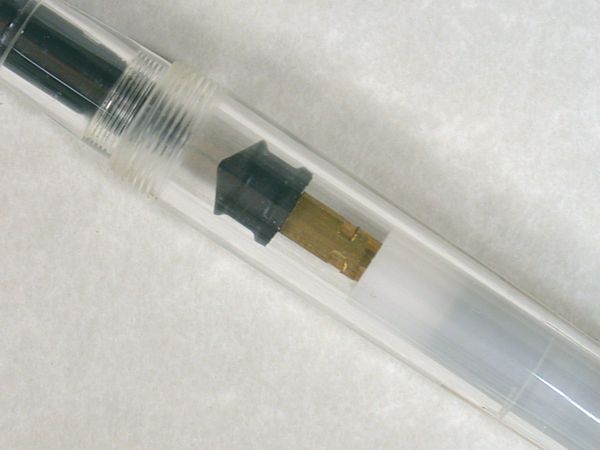
The only other part used in the system is a Breather Tube attached to the back of the Section housing (shown in black in the photo). The breather tube allows the air inside the barrel to be expelled as it draws ink into the Reservoir through a second hole in the back of the nib housing.
(click here to go back to the top of the page)
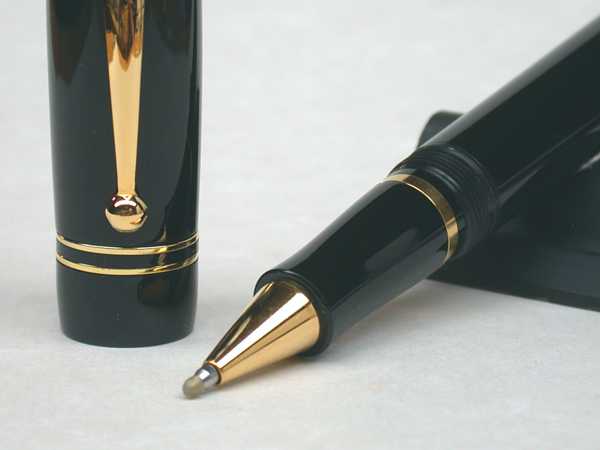
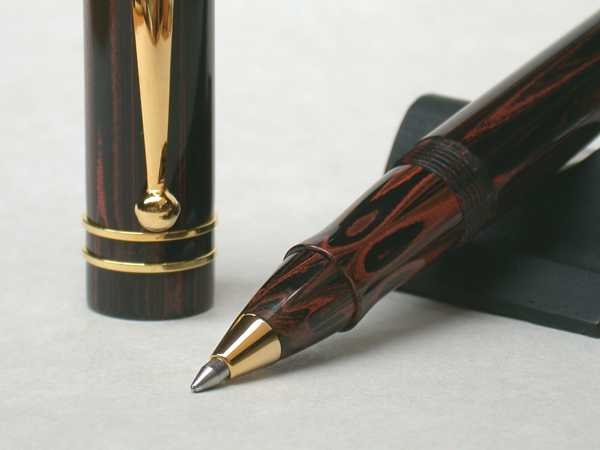
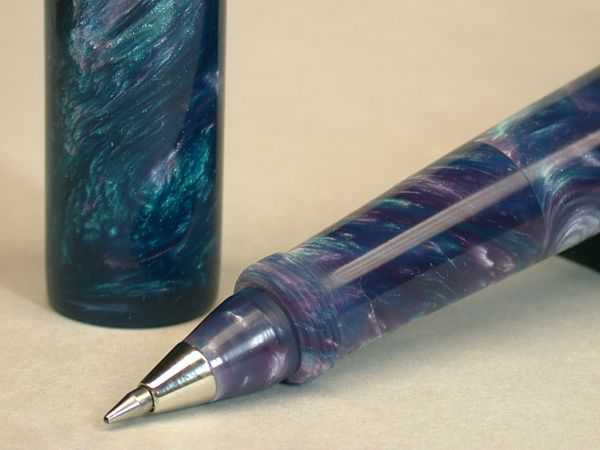
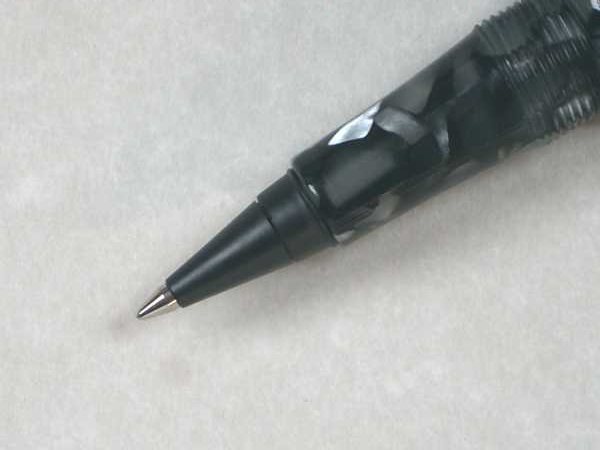
I never thought of including these with Fountain Pen Filling Systems before, but after getting questions whether I offered them, I thought maybe it would be a good idea. So here they are! Just about any of my fountain pens can be made as Rollerball or Ballpoint pens. Over the years, the line between rollerball and ballpoint has kind of blurred. Many refer to both as ballpoints--even some manufacturers. Although there are a few other subtle differences (tip material and how the ink is ejected), the main difference between the two is in the ink. Rollerball inks have less viscosity, and typically water based. Because of this, rollerball inks take longer to dry. And because of the difference in viscosity, another term used to define a rollerball is 'GEL'. Parker for example calls their roller-ball refill a GEL ballpoint. So you can see how people can be confused.
Normally how I approach making a roller-ball or ball-poiint is to use the standard fountain pen Section (for the specific pen style), then add a 'nose-cone'. Most manufacturers use a plain tapered Section, but I prefer keeping the original style Section. But if you prefer the tapered Section, I can make those too.
Metal Nose-cones... As shown in the photo's, I offer TWO different metal nose-cone styles (also called 'tips'). The large cone is only available in gold. The small cone is available in gold, rhodium and nickel. And if you prefer, I can also make a fully acrylic nose-cone.
Refill styles... Their are several refill styles available: Parker, Schmidt and Pilot. The Pilot (G2) is the longest, so that refill can only be used in the larger/longer pens. The Parker is the most versatile, because Parker makes a Roller-ball refill that's exactly the same as their Ballpoint refill. (they call it a 'liquid ball-point', but that's actually all a rollerball is. Rollerball's just used a lower viscosity ink).
Schmidt Rolling Righter... Another type of rollerball I offerr is the Schmidt Rolling Righter. If you've never heard of the Rolling Righter, you're not alone. Schmidt offers the Rolling-Righter as a replacement or swap-out tip for their fountain pen nibs. So unless you're into Schmidt fountain pens, you most likely wouldn't be familar with them. What makes the Rolling Righter unique is that it uses fountain pen ink. The back end (not shown in the photo) looks just like a fountain pen nib housing. So it mounts into a fountain pen section just like a fountain pen nib, then works just like a C/C (Cartridge/Converter) fountain pen by installing the cartridge or converter as you normally would at the back of the Section. Pretty Cool!
(click here to go back to the top of the page)
How to order a Custom Ink-filler Fountain Pen:
Because of the various styles and sizes of pens, some inking systems are better suited for certain pen styles than others. So if you have a specific pen style in mind you'd like to order with a custom ink system, just email me to see what systems might best be used. Click the CONTACT & INFO box at the far left end of the drop-down list at the top of the page for the email link. If you send me an email, I'll get
back to you as quickly as possible. Because
I offer a variety of pen styles and options, pens are custom orders only--I do not stock any pens for immediate sale. But as long as the materials are readily available, I can usually turn around
any order in 2-3 weeks.
I'm constantly making and posting new pen styles, so please stop by often to see my latest additions.
Thanks again for visiting, please come back again soon.
Cordially...JEB

